


Enhance your beach house with WindsorONE tongue & groove boards
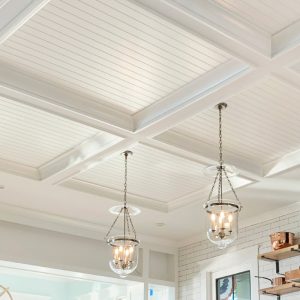
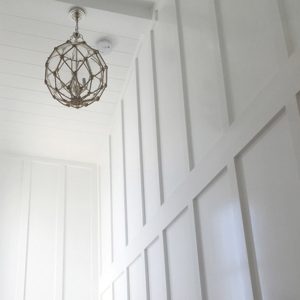
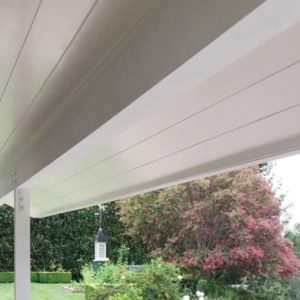
San Diego’s beach houses are renowned for their stunning views and luxurious designs. However, the coastal environment can be harsh on building materials, making it essential to choose products that offer durability and aesthetic appeal. WindsorONE trim boards stand out as the perfect choice for these homes. With their smooth, clean look on every porch lid (exterior ceiling), interior ceiling, and wall, WindsorONE trim boards & specialty boards elevate the elegance of any beach house while providing the resilience needed to withstand coastal conditions.


Flagg Coastal Homes: Master Craftsmanship in Every Detail
When it comes to high-quality coastal homes, Flagg Coastal Homes is a name synonymous with exceptional craftsmanship. Their expertise in building and renovating beach houses ensures that every detail is meticulously executed. By choosing WindsorONE boards, Flagg Coastal Homes guarantees that the interiors and exteriors of their projects not only look stunning but also stand the test of time. The combination of WindsorONE’s premium materials and Flagg Coastal Homes’ masterful execution results in residences that are both beautiful and enduring.


Exploring WindsorONE’s Versatile Products
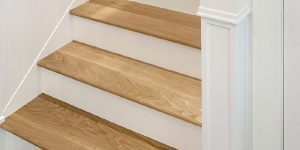
WindsorONE offers a variety of SKUs to cater to different design and construction needs. Among the most popular options are the WOTG (WindsorONE 1×6 Tongue & Groove), SPBC6 (1×6 Tongue & Groove with a Bead) and SPBC8 (1×8 Tongue & Groove with a Bead). The WOTG boards are perfect creating seamless, polished surfeces on porch lids and ceilings, while the SPBC6 and SPBC8 specialty boards are ideal for larger wall panels and exterior applications. Each SKU is crafted with the same attention to detail and commitment to quality, ensuring that every piece contributes to the overall elegance and durability of the home.

Achieving Lasting Beauty for Both Interiors and Exteriors
Whether you’re looking to enhance the interiors or exteriors of your beach house, WindsorONE boards provide the versatility needed to achieve a cohesive and beautiful design. Their smooth finishes and clean lines make them suitable for a variety of applications, from elegant interior wall paneling to sturdy exterior cladding. By incorporating WindsorONE boards into your home, you can create a unified aesthetic that flows seamlessly from the inside out, adding value and charm to your property.


Investing in Premium Protection Against the Elements
The coastal environment can be tough on building materials, with constant exposure to salt, moisture, and sunlight. WindsorONE boards are designed to offer premium protection against these elements, ensuring that your beach house remains in excellent condition. The boards come with a 30 year warranty and are treated to the core using Tru-Core technology that protects against rot, insects and mold. By choosing WindsorONE, you’re investing in a product that not only enhances the beauty of your home but also provides long-lasting protection against the harsh coastal climate. For this project we’d like to give a shoutout to Dixieline Lumber and Home Center in Sports Arena in CA for supplying the WindsorONE and Capital Lumber for distribution! Thank you for putting Craftsmanship First for you customers.
How to Install WindsorONE Tongue & Groove in a Porch lid or exterior ceiling Application:

Prep Work:
- Check Framing:
Ensure your joists or rafters are level, in plane and adequately spaced. If they’re not perfectly even, install furring strips, blocking or sheathing to create a level plane for the T&G boards.
- Acclimate Material:
Let WindsorONE T&G boards acclimate to your job site for 48–72 hours. Based on the location of install check moisture content; approximately 11-14% MC is adequate for most exterior environments. - Plan ahead for Movement:
Leave at least ¼” gap around all sides of the ceiling for expansion and contraction. A small trim detail is recommended to cover this gap and give a finished look.
Layout:
- Snap Chalk Line:
Determine your starting side (usually opposite the house wall for best visibility) and snap a straight chalk line perpendicular to the joists.
- Find Center (for symmetrical layout):
If doing a V-groove pattern with a center bead, measure and work outward from the middle to balance the look.
Installation Steps:
- Start with the First Board:
Place the groove side toward the starting edge.
Nail through the face near the edge and also angle-nail through the tongue into blocking or framing. - Continue the run:
Fit each new board’s groove over the previous board’s tongue.
Tap into place with a rubber mallet and scrap board if needed.
Blind nail through the tongue to hide fasteners. - Stagger Joints (if necessary):
For longer spans, stagger end joints for strength and aesthetics. - Trim to Fit at Edges:
The final board will likely need to be ripped to fit.
Leave a small expansion gap at the edge (~1/8″).
** Note: Recommended fasteners are stainless or galvanized in 6d penny nail or 15 gauge finish nails with at least 1 ¼” penetration into framing or sub-structure.